Keeping It Real

Saturday, July 16, 2016

I sat down to countless tea parties with my daughters when they were small.  They turned on their best British accent and served the tastiest plastic desserts known to man.  Some days I might find tea in my cup, some days chocolate milk, or orange juice, or delicious water straight from the bathroom sink.  And I might have gotten stuck in the tiny, little tea party chair a time or two, but those were my favorite parties.  There’s something pretty special about those plastic desserts, but if you want to keep it real, these cakes and petit fours are fun to make and perfect for kids helping in the kitchen and even tea parties.  Optional, of course, because nothing could take the place of those fabulous plastic scones – my favorite!  By the way, while I was playing around with making these sweet, little cakes, I burned lunch.  🙂 How’s that for keeping it real!  Y’all have a wonderful weekend!

IMG_2161  IMG_2157

Easy Tea Party Cakes & Petit Fours

Ingredients:

1 Sara Lee Pound Cake, thawed

Strawberry Jam

2 Containers of strawberry frosting, or your choice

Decorations of your choice

Directions:

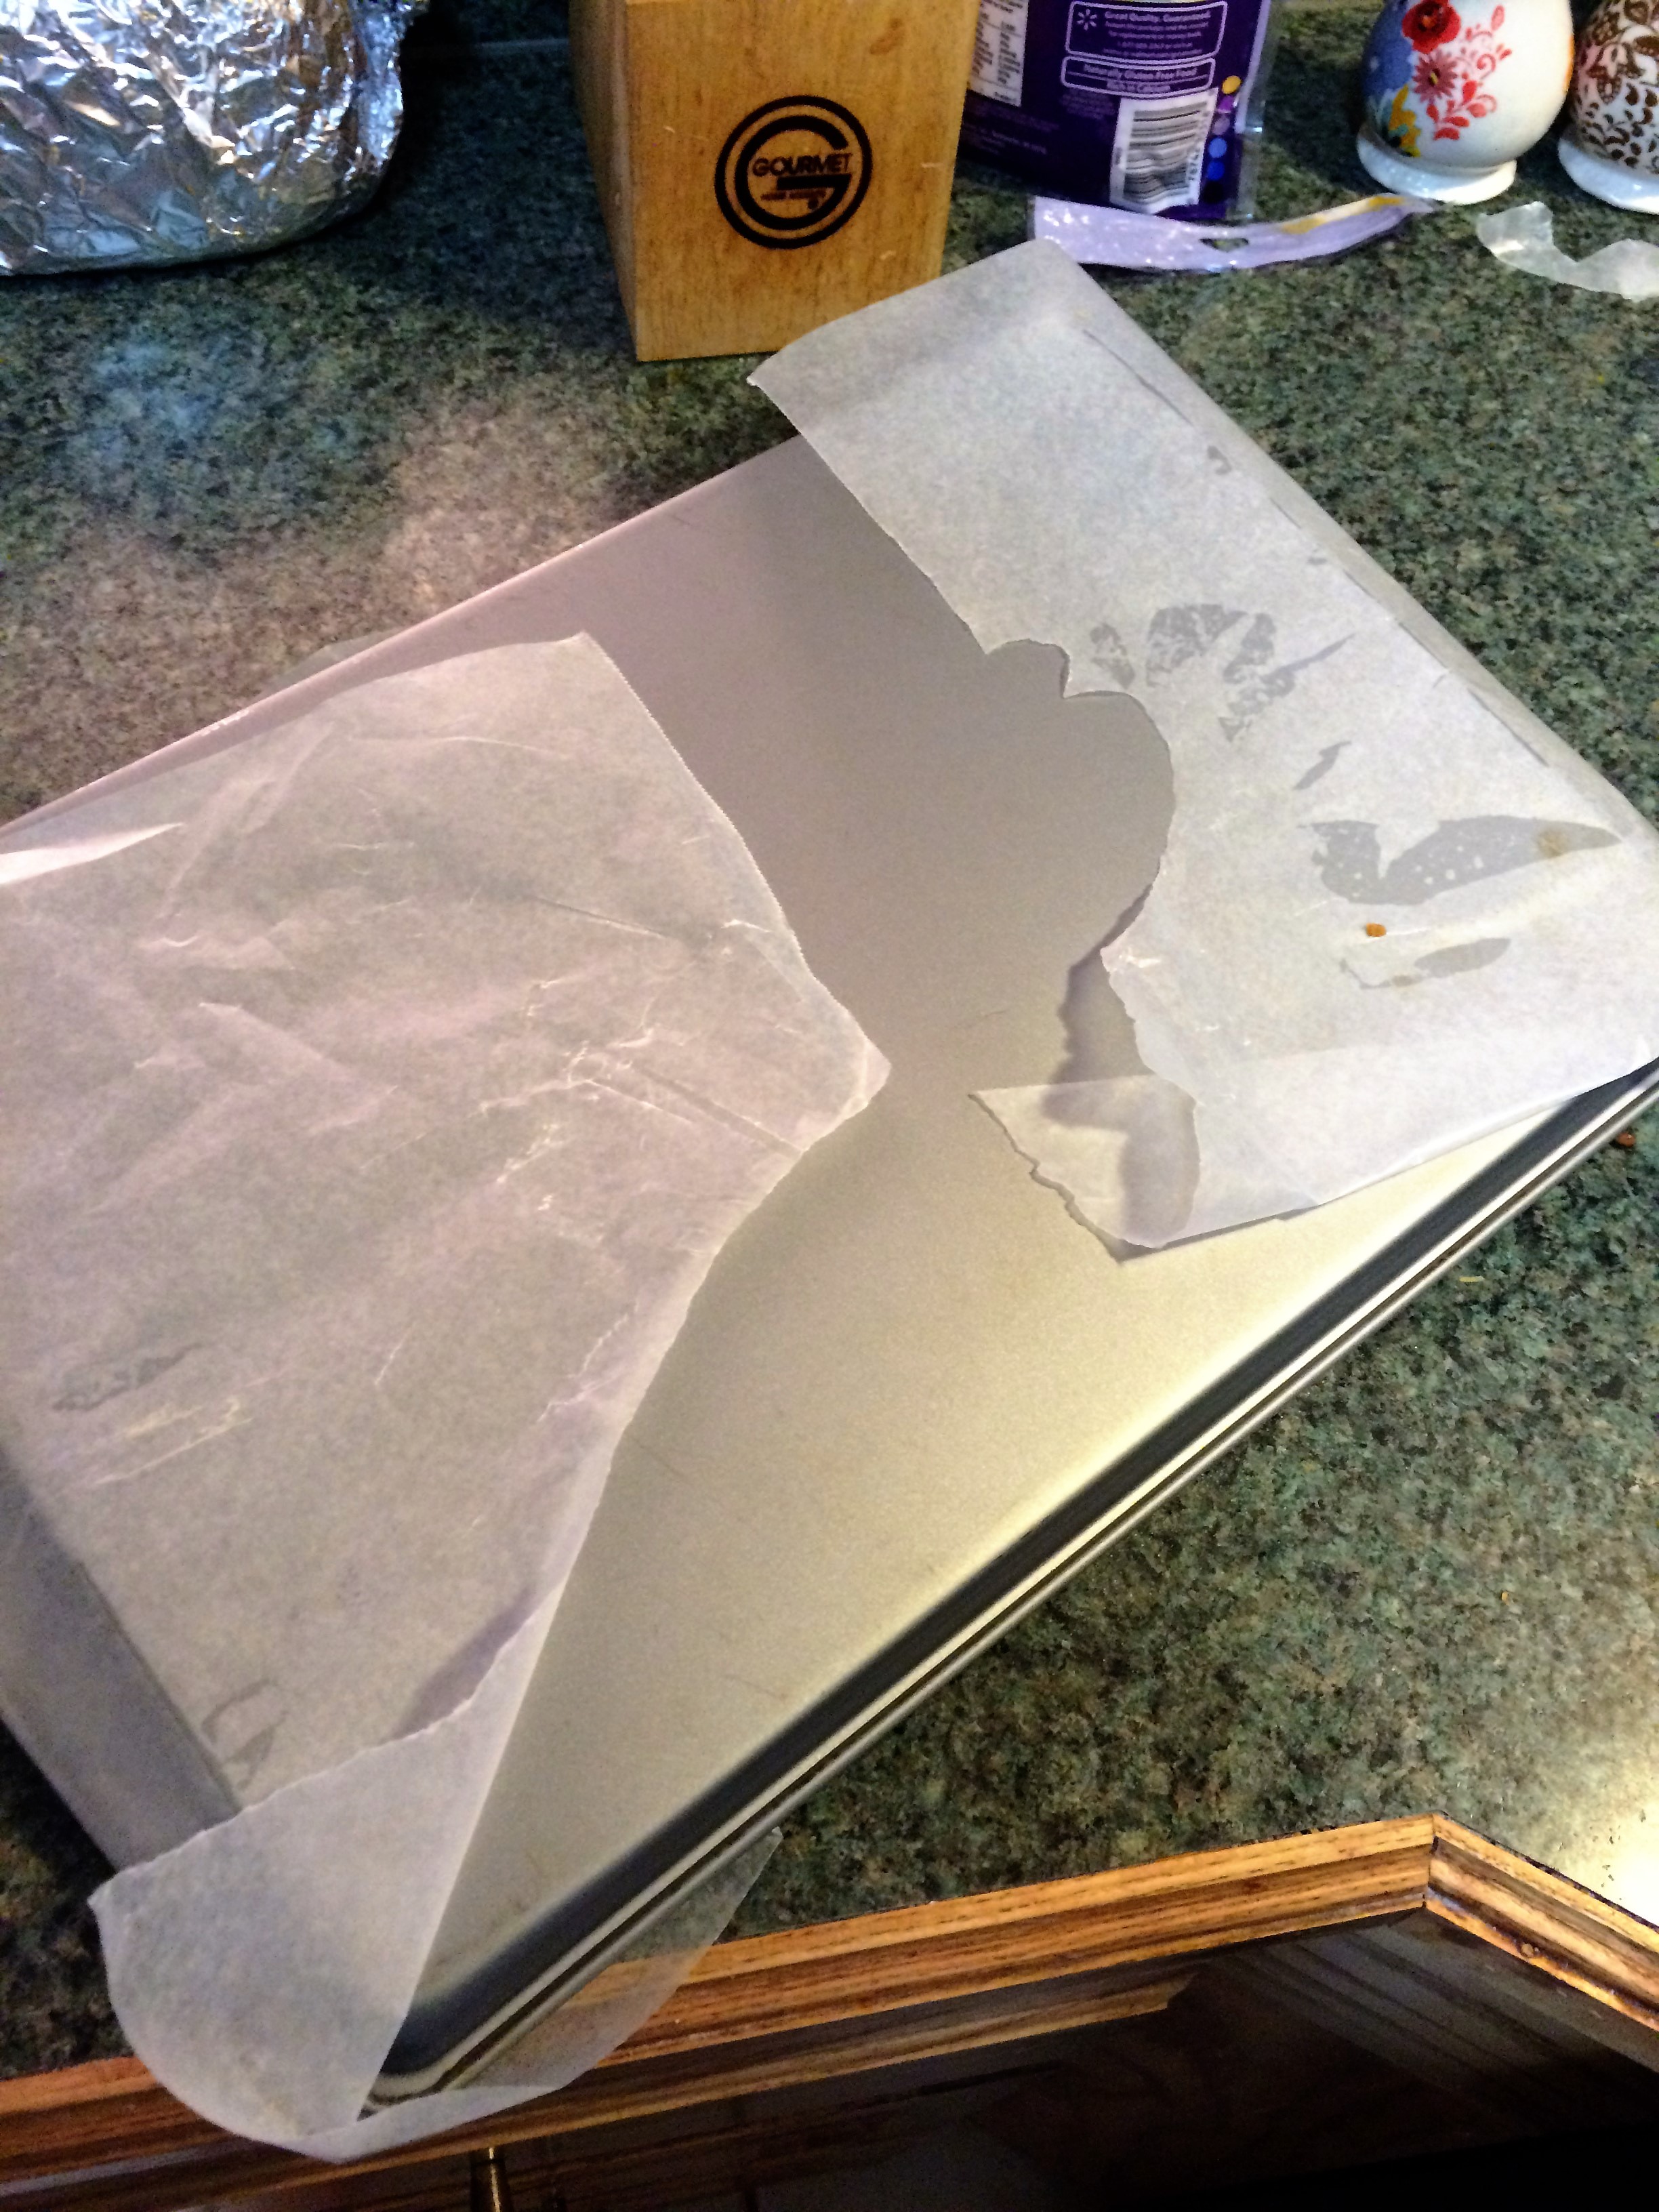
Place a cooling rack on top of a sheet of wax paper.

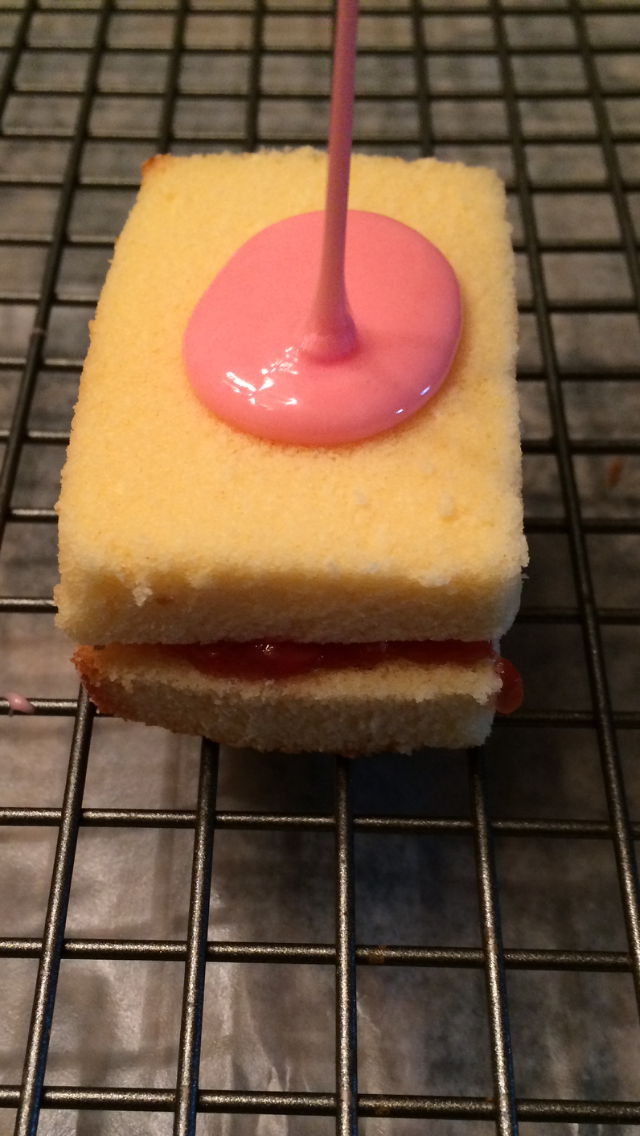
Slice pound cake into small, stackable rectangles.  Spread desired amount of strawberry jam on one piece of cake and stack a second piece on top.  Place on cooling rack.

For Petit Four Frosting:  Spoon about 1/2 cup of frosting into a microwaveable cup or dish and microwave for 15 seconds or until pourable.  Stir.

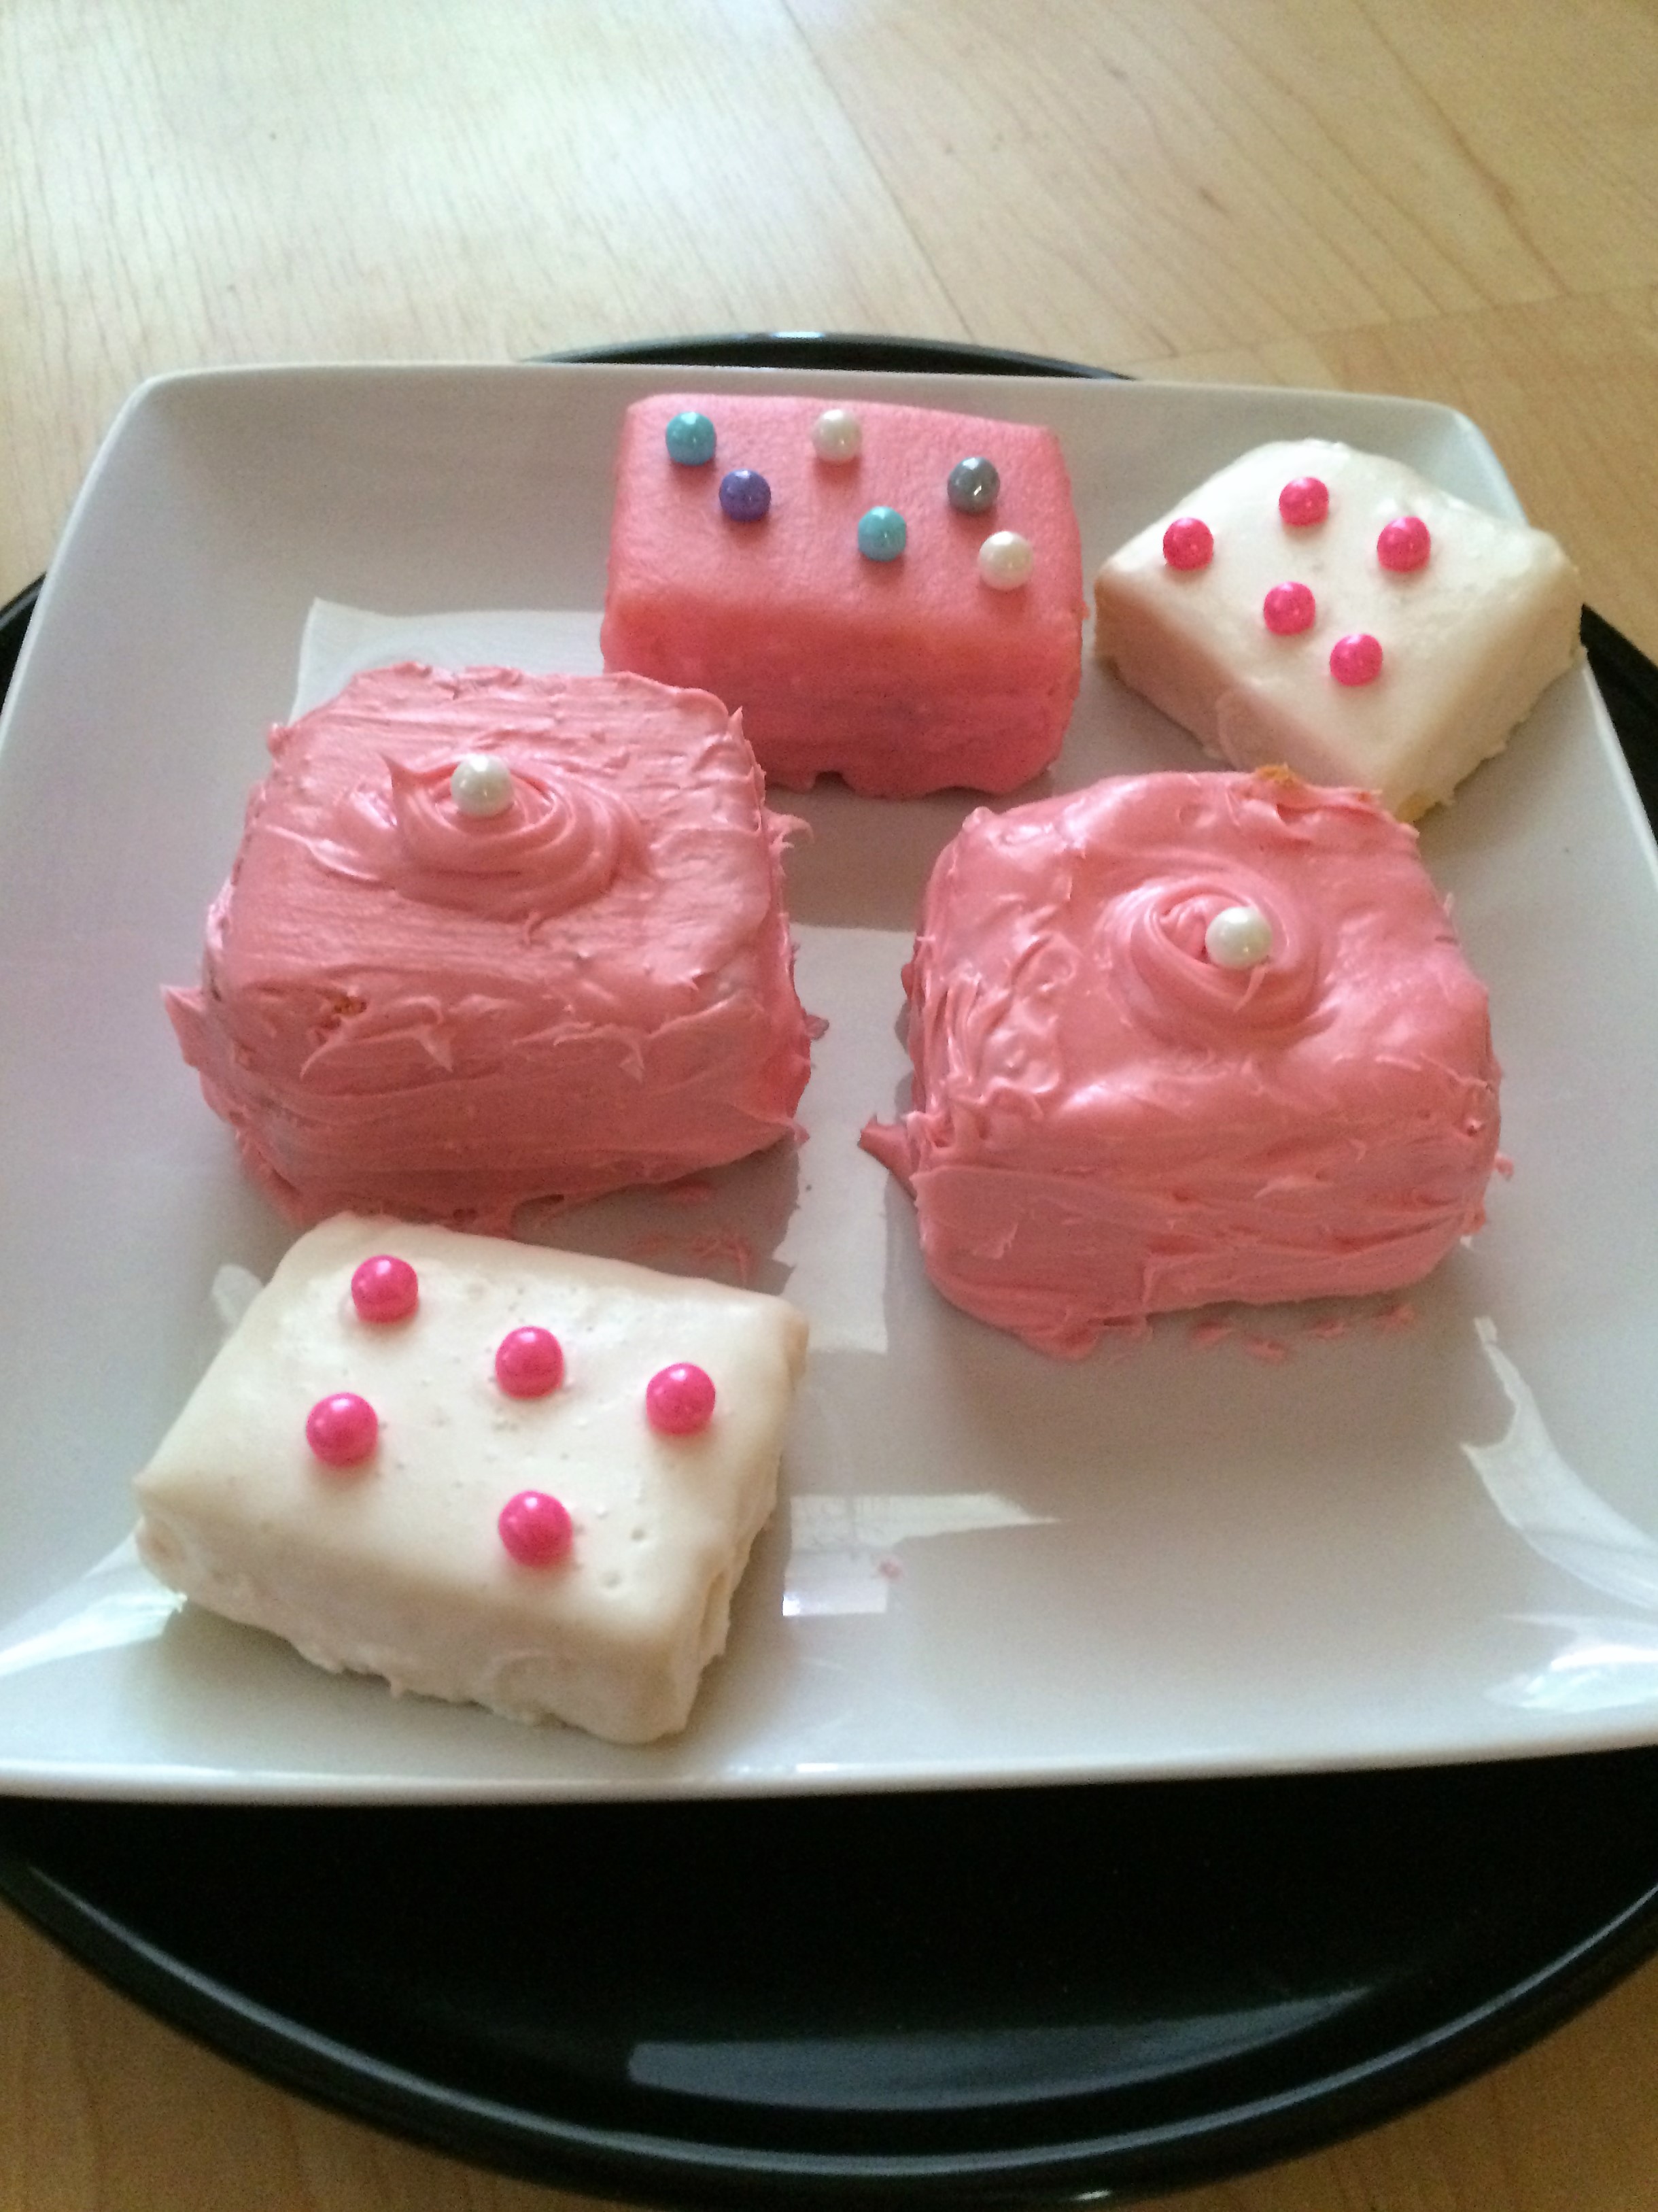
Pour frosting over cake that has been placed on cooling rack (this will catch dripping frosting).  Carefully spread and smooth frosting if necessary.  Once frosting is set, decorate cake and move to serving plate.

For easy to spread cake frosting:   Spoon about 1/2 cup of frosting into a microwaveable cup or dish and microwave for 8 seconds.  Stir.  Spread frosting over cake that has been placed on cooling rack.  Decorate and move to serving plate.

Continue microwaving frosting 1/2 cup at a time until all your little cakes are frosted.

Enjoy these and have so much fun!

Tawnya

Trisha Yearwood’s Blueberry Pancakes

Friday, July 15, 2016

Good morning, everyone!  Happy Friday!  I’ve been really excited about sharing this recipe with you.  Remember, I warned you about baking my way through a bunch of blueberries…  I didn’t want to bombard you with blueberry posts, so I waited…. and here it is!  These blueberry pancakes definitely go down as one of the best things I ever ate.  You have to try them!  Soon! 🙂  I hope your weekend is fabulous!!

IMG_2133

Trisha Yearwood’s Blueberry Pancakes

Ingredients:

1-3/4 cups all-purpose flour

2 tablespoons sugar

1 teaspoon baking powder

1/2 teaspoon baking soda

1/2 teaspoon salt

2 large eggs

1 cup milk, plus more if needed

1 cup sour cream

1 stick butter, melted

1/2 teaspoon vanilla extract

1-1/2 cups fresh or frozen blueberries

1/2 teaspoon lemon zest

Instructions:

Sift flour, sugar, baking powder, baking soda and salt into a large mixing bowl.  In a separate large bowl, lightly whisk the eggs.  Add the milk, sour cream, half the melted butter and the vanilla, whisking to blend.  Make a well in the dry ingredients and pour the egg mixture into it.  Whisk the ingredients together just until blended.  Fold the blueberries and lemon zest into the batter.

Heat a large skillet or griddle over medium heat and coat with some of the remaining melted butter.  For each pancake, pour about 1/4 cup of the batter into the hot skillet.  Cook 3 or 4 pancakes at a time, depending on the size of the skillet.  If the batter seems too thick, thin it with 1 to 2 tablespoons milk.  When bubbles begin to form and “pop” on the pancake’s surface, after about 1 minute, and the outer edge looks done, flip it over and cook briefly for about 30 seconds on the other side.

(Recipe Source:  Food Network)

*Note:  I used 1/4 teaspoon lemon extract in place of zest.  I added an extra tablespoon of sugar to my pancake batter, making it 3 tablespoons.  Enjoy!

Tawnya

Crockpot Stuffed Bell Peppers

Thursday, July 14, 2016

I broke out the crockpot again!  This time, some quick stuffed bell peppers were cooking in my kitchen.  This has become my two for one meal deal.  Not everyone in my house loves bell peppers, so I use part of the mix to make a little, mini-meatloaf.  Everyone is happy and that is awesome!  Go ahead, break out your crockpot and try these.  Set it to cook for 4 hours and move on to better things, which, around here, includes a game of Uno, because we’re a wild and crazy bunch!  🙂  Y’all have a wonderful day!

IMG_2139


IMG_2118  IMG_2126

Crockpot Stuffed Bell Peppers

Ingredients:

4 bell peppers

1/4 cup of water

For Meat Mixture:

1 pound of ground beef

1 cup cooked rice

1 egg

1 tablespoon of yellow, prepared mustard

3 heaping tablespoons of chunky salsa, or to taste

3 tablespoons of tomato sauce (from 8 ounce can)

1/4 teaspoon garlic powder, or to taste

1/4 teaspoon onion powder, or to taste

Salt and pepper, to taste

Additional tomato sauce to drizzle over top of peppers

Shredded cheddar cheese

Instructions:

Slice tops off peppers and remove seeds.  Wash peppers and set aside.  Add 1/4 cup of water to crockpot.

For Meat Mixture:  To a medium sized bowl, add ground beef, cooked rice, egg, mustard, salsa, 3 tablespoons tomato sauce, garlic powder, onion powder, salt and pepper.  Squish together with your hands until totally combined.

Fill each pepper with 1/4 of the meat mixture.  Place peppers into crockpot.  Drizzle remaining tomato sauce on top of each pepper and top each one with cheese.  Cover and cook on high for 4 hours.  Enjoy!

If you’re like me and need the two for one deal…

For the meatloaf… before adding cooked rice to the mix, move about 1/4 of meat mixture to a separate bowl and, instead of rice, add about 6-8 crumbled Ritz Crackers.  Mix until totally combined.  Place meatloaf mixture into baking dish and form into mini-loaf.  Cover with tomato sauce.  Bake at 350 degrees for 30-45 minutes.  (For extra flavor, if you’re interested, at last 20 minutes of baking, drizzle ketchup on top of meatloaf and return to oven.)

Makes 3 Crockpot Bell Peppers and 1 mini-meatloaf.  A two for one… sort of.  🙂

Tawnya

Blueberry Lemon Bread

Wednesday, July 13, 2016

I love when it’s blueberry season!  Going blueberry picking is kind of our thing, and we missed our chance this year.  So, I bought a bunch.  A whole bunch.  Now y’all bear with me while I bake my way through them, okay?  It won’t be so bad – I promise!  🙂  Have a very happy Wednesday!

IMG_2109  IMG_2110  IMG_2112

Blueberry Lemon Bread

Ingredients:

2 cups all purpose flour + 1 tablespoon, divided

2 teaspoons baking powder

1/2 teaspoon salt

1/2 cup oil

2 teaspoons vanilla extract

2 eggs

1 cup granulated sugar

1 cup sour cream

Zest & juice of 1 lemon*

1 cup blueberries

For Lemon Glaze

3/4 cup confectioners sugar

1-2 tablespoons fresh lemon juice*

Instructions:

Preheat oven to 350 degrees.  Spray a 9×5 loaf pan with cooking spray and set aside.

In a small bowl, toss blueberries with 1 tablespoon of the flour and set aside (this helps to prevent the blueberries from sinking).

In a large bowl, whisk together 2 cups of flour, baking powder, and salt.  Set aside.

In a separate bowl, mix together oil, vanilla, eggs, sugar, sour cream, *lemon zest and lemon juice.

Combine the wet and dry ingredients, just until smooth.  Do not overmix.

Lightly fold blueberries into the batter.

Pour batter into prepared loaf pan and bake for 50-60 minutes.  The bread will be finished when a wooden toothpick inserted into the center comes out clean.

Once bread is finished, remove from oven and allow to cool for about 10 minutes in the loaf pan.  Remove from loaf pan and transfer to a wire rack to cool completely.

Once bread has cooled, whisk together the confectioners sugar and lemon juice.  Start with one tablespoon of lemon juice and whisk well.  If your mixture is too thick, slowly add up to one more tablespoon of lemon juice.  You want the glaze to be thin enough to drizzle, but thick enough to set.

Using a spoon, drizzle the glaze on top of the bread.  The glaze should set after about 15-20 minutes.

(Recipe Source:  livewellbakeoften.com)

*I rarely have a fresh lemon around when I need it.  I used 2 teaspoons of lemon extract in place of lemon zest/juice in the batter.  For the glaze, I used a bit of lemon juice from my fridge.  Enjoy!

Tawnya


Crockpot Italian Chicken

Tuesday, July 12, 2016

Crockpot Italian Chicken is the easiest meal you’ll ever make.  There are only two ingredients, but don’t let that fool you; it’s pretty tasty.  Even better, there are plenty of things you can make with the leftovers.  Toss these ingredients in the crockpot on a day when you’re short on time; you’ll be glad you did.  When you get home, your kitchen will smell amazing!  Best day ever!

IMG_2104

 Crockpot Italian Chicken

Ingredients:

12 chicken breast tenderloins, frozen

1 bottle of Zesty Italian salad dressing

That’s all – no kidding! 🙂

Place frozen chicken tenderloins in crockpot (stack if necessary).  Pour Italian dressing over chicken.  Cover and cook for 4 hours on high or 8 hours on low.  Enjoy!

Note:  My family loves this served with rice.  Chop up leftover chicken for a salad or wrap.  Delicious!

Tawnya

Crescent Roll Breakfast Casserole

Monday, July 11, 2016

Hello, everyone!  I hope your Monday morning is wonderful so far.  Here’s a quick and delicious breakfast casserole to get things started this morning.  You can’t go wrong with these layers of goodness.  It’s all the best flavors of breakfast combined into one fabulous dish.   Give it a try; it might make its way into your breakfast rotation.  Y’all have a great Monday!

P.S.  You know what made this even easier to prepare?  The Pillsbury Seamless Crescent Dough Sheets I spotted at the grocery store!  And, honestly, the fact that I became super excited about this made me realize I might need to get out more. 🙂

IMG_2092  IMG_2098

Crescent Roll Breakfast Casserole

Ingredients:

2 cans of original crescent roll dough

1 pound of ground pork sausage, cooked, drained (any flavor, but my favorite comes from my Uncle John’s kitchen)

6 eggs, whisked

8 ounces cream cheese, softened

1-1/2 cups shredded cheddar cheese

Heat oven to 350 degrees.  Very lightly spray a 9 x 13 cake pan with cooking spray.

Lay 1 can of crescent roll dough flat in cake pan (press seams together if you did not find seamless dough).  Bake for 10 minutes and remove from oven.

Brown sausage and drain.  Combine cream cheese with sausage, stirring until well combined and no lumps of cream cheese remain.  Spread mixture over baked dough.

Whisk eggs and pour over sausage mixture.  Spread cheese over eggs.

Lay remaining crescent roll dough flat over cheese (press seams together if necessary).  Bake for 25 minutes.  Enjoy!

Tawnya


Crockpot Mississippi Roast

Sunday, July 10, 2016

A friend of mine discovered this Crockpot Mississippi Roast recipe on Pinterest and shared it with me and, goodness, I’m glad she did.  It was cooking in my kitchen today.  You know I won’t pass up a great crockpot recipe, and this one packs tons of flavor.  Even better, it’s easy to prepare and my family loves it.  It’s wonderful – try it and see! 🙂  I hope your day is a really great one!!

IMG_2082

Crockpot Mississippi Roast

Ingredients:

4 pound beef roast

1 packet of dry Ranch dressing seasoning mix

1 packet of Au Jus Gravy mix

1/2 stick of butter

5-6 pepperoncini peppers

Place roast in crockpot.  Sprinkle Ranch dressing mix and gravy mix over top of roast to coat.  Slice butter and lay slices in single layer over top of roast.  Lay peppers in single layer over top of roast.  (No liquids required.)  Cover and cook on low for 8 hours.  Shred if you’d like.  Enjoy!

Tawnya

Harvest Almond Chicken Salad

Saturday, July 9, 2016

It’s sandwiches at my house today, so I mixed up some pretty fabulous chicken salad.  Not just any chicken salad, though.  This recipe has all kinds of goodness!  It brings some life to sandwich day, and it might just be the best thing I ever ate (for today).  🙂  Declare this sandwich day at your house and give this chicken salad a try!  It’s summery and you’ll love it!  Have a great Saturday, everyone!

 IMG_2071  IMG_2080

Harvest Almond Chicken Salad

Ingredients:

2- 10 ounce cans of Hormel Premium Chicken Breast

2/3 cup apples, diced

2/3 cup grapes, sliced in half

1/4 cup sliced almonds

1/2 – 2/3 cup mayo, or to taste

1 tablespoon lemon juice

1/4 teaspoon garlic powder

1/8 teaspoon onion powder

1 tablespoon sugar

1/2 tablespoon fresh thyme, minced*

Salt and pepper, to taste

Drain cans of chicken and add to large bowl.  Add remaining ingredients and stir well to combine.  Enjoy!

(Adapted from thechunkychef.com)

*Note:  I use 1 teaspoon of dried Thyme Leaves instead of fresh.  Depending on the size of the grapes, I typically quarter them instead of slicing in half.

Tawnya

Coffee Cake Muffins

Friday, July 8, 2016

Good morning, everyone!  If you’re looking for a quick and easy to make breakfast this morning, try these Coffee Cake Muffins.  They’re light and delicious and so hard to resist!  I might have eaten more than one, but who’s counting!  🙂  Happy Friday!!  Have a great day!

IMG_2066

Coffee Cake Muffins

Ingredients:

1-1/2 cups all purpose flour

1 cup sugar, divided

1-1/2 teaspoons baking powder

1/2 teaspoon salt

1/4 teaspoon nutmeg

1 egg, beaten

3/4 cup milk

1/3 cup butter, softened

1 teaspoon cinnamon

1/3 cup butter, melted

Heat oven to 350 degrees.  Grease a 12-cup muffin pan.  Mix flour, 1/2 cup sugar, baking powder, salt and nutmeg in a medium bowl.  Beat egg and milk in a small bowl.

Beat softened butter in a large bowl until light and fluffy.  Add flour mixture and egg mixture alternately, mixing with a wooden spoon after each addition.  Do not overmix.

Spoon batter into prepared muffin pan, filling each cup 2/3 full.  Bake until a toothpick inserted into center comes out clean or until muffins are golden brown, about 15 minutes.

Mix remaining sugar and cinnamon in a bowl.  Remove muffins from pan.  Dip muffin tops in melted butter, then in cinnamon-sugar.  Place right side up on a wire rack; cool or serve warm.  Enjoy!

(Recipe Source:  Easy Everyday Cooking)

Tawnya

A Zillion Cookbooks and None Like the First

Thursday, July 7, 2016

I think I’ve collected a zillion cookbooks, but I still remember the first one I bought on my own 24 years ago.  A representative from Great American Cookbooks stopped by my workplace with a new edition to sell – a Collector’s Edition! 🙂  My Mom had tons of cookbooks, so the thought of having a cookbook of my own was pretty exciting and… a Collector’s Edition at that!  It’s a Great American Favorite Brand Name Cookbook.  It has 575 pages of recipes and I made one recipe from it.  No, really – just one.  I referred back to that one recipe so many times, the book is warped, and that makes it even more awesome.  I love cookbooks and won’t stop at a zillion, but there will be none like my very first cookbook and that one recipe – Burrito Bread.  It was cooking in my kitchen today.  I have adapted the recipe over the years according to my family’s likes and dislikes and it’s always a hit around here.  I hope you’ll try it; I think you’ll be glad you did!  I mean, bread that tastes like a burrito, who can resist that!?!? 🙂  I hope your day is awesome!

IMG_2057

Burrito Bread

Ingredients:

1 loaf of frozen bread, thawed

1 pound ground beef, cooked, drained

1 package taco seasoning

1 cup of water

1/4 cup of chunky salsa

Enough crushed wheat chex to equal 3/4 cup

Shredded cheddar cheese

1 tablespoon butter, melted

Chili powder

Wax paper

Cooking spray

Thaw bread dough – about 2 hours.  Heat oven to 350 degrees.  A long cookie sheet works best for baking this bread.  Pull a sheet of wax paper that is quite a bit longer than the cookie sheet you will be using.  Lay sheet of wax paper on counter and spray with cooking spray.

Cook and drain ground beef and return to pan.  Add taco seasoning, water and chunky salsa.  Let simmer.

(Leave excess paper at each end of your sheet of wax paper.)  About 8 inches from top of wax paper, lay bread dough on paper and roll to about 15 inches long and 6-8 inches wide.  I use my hands to pull and shape bread dough.

Add wheat chex to ground beef mixture and stir until mixed well.  Remove from heat.

Spoon half the ground beef mixture lengthwise down the center of bread dough.  Top with cheese.  Repeat with remaining ground beef mixture and top with cheese.  Bring sides of dough up and over filling and seal well.  Seal ends.  At this point, I shape bread into a little curve (see picture).  Place seam side down on ungreased cookie sheet (see picture for technique that works for me).  Brush top with melted butter and sprinkle a light layer of chili powder on top.  Bake 30 to 35 minutes or until golden brown.

Sealed and curved…

IMG_2052

Try this technique for placing seam side down on cookie sheet…

IMG_2054

Lay top of cookie sheet over seam of bread.  The excess paper on each end comes in handy here.  Pull excess paper over each end of cookie sheet.  Now, get a good grip on each end of the cookie sheet and, holding the wax paper in place, throw caution to the wind and give it a good, strong flip.

Thank goodness!

IMG_2055

The end result is worth it!  I promise!  Enjoy!

IMG_2057

Tawnya