Wednesday, July 27, 2016
 This was supposed to be dinner. But it just smelled so good, and I couldn’t resist, so it became brunch. I feel like that’s another confession. Who in the world eats foods like this for brunch? You do, don’t you…. oh, thank goodness, for a minute there I thought I was the only one. 🙂 This Chile Colorado Burrito is pretty irresistible and easy to make! You’ll see!
 The delicious, meaty filling starts in the crockpot which, of course, makes it a winner already. I turned my crockpot on just before calling it a night. It cooked while I slept and I woke up this morning to something that smelled pretty dreamy. And, you guessed it, brunch was served! Try it – there’s no sense in waiting till dinner. It makes the perfect brunch, and that’s a promise! 🙂 Have a fabulous Wednesday! You totally deserve it!
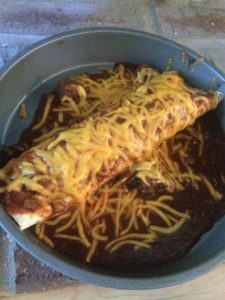
Crockpot Chile Colorado Burritos
Ingredients:
2 pounds of stew meat
19 ounce can of mild, red enchilada sauce
2 beef bouillon cubes
1 can of refried beans
Burrito size flour tortillas
Shredded cheddar cheese
Directions:
Place stew meat, beef cubes, and enchilada sauce into crockpot and stir to combine. Cover and cook on low for 8 hours.
Once stew meat has finished cooking, turn your oven on to Broil. Warm refried beans in microwave. Lay a tortilla on an oven safe plate or pan. Spoon refried beans down one side of tortilla. With a slotted spoon to drain some of the sauce, spoon cooked stew meat over beans. Roll filled tortilla burrito style. Ladle sauce from crockpot over top of burrito. Sprinkle cheese on top. Place in oven and broil until cheese is melted and bubbly, about 2-4 minutes. Incredible!
(Recipe Source: Food Pusher)
Note: If you are concerned about saltiness, use one beef cube; I did and it was incredibly flavorful. Use at least 19 ounces of red enchilada sauce – more if you’d like. Enjoy!
♥Tawnya